Your subscribers, in your own database.
Import a list with a dry run first, keep what you know about each reader, group them with segments that update themselves, and bring new people in with signup forms you build and preview in the dashboard.
-
Step 1
See everyone, with their status
Subscribers lists each person with their email, name, status, tags and when they joined. The buttons above the table filter by status and show a count for each. Search by email address or name, filter by tag, and choose which columns to show.
- Change many at once: tick several rows and add or remove a tag, set a field, unsubscribe or delete.
- Add someone by hand. Tick "They asked to receive this publication" only if they did; otherwise they are added as pending and get nothing until they confirm.
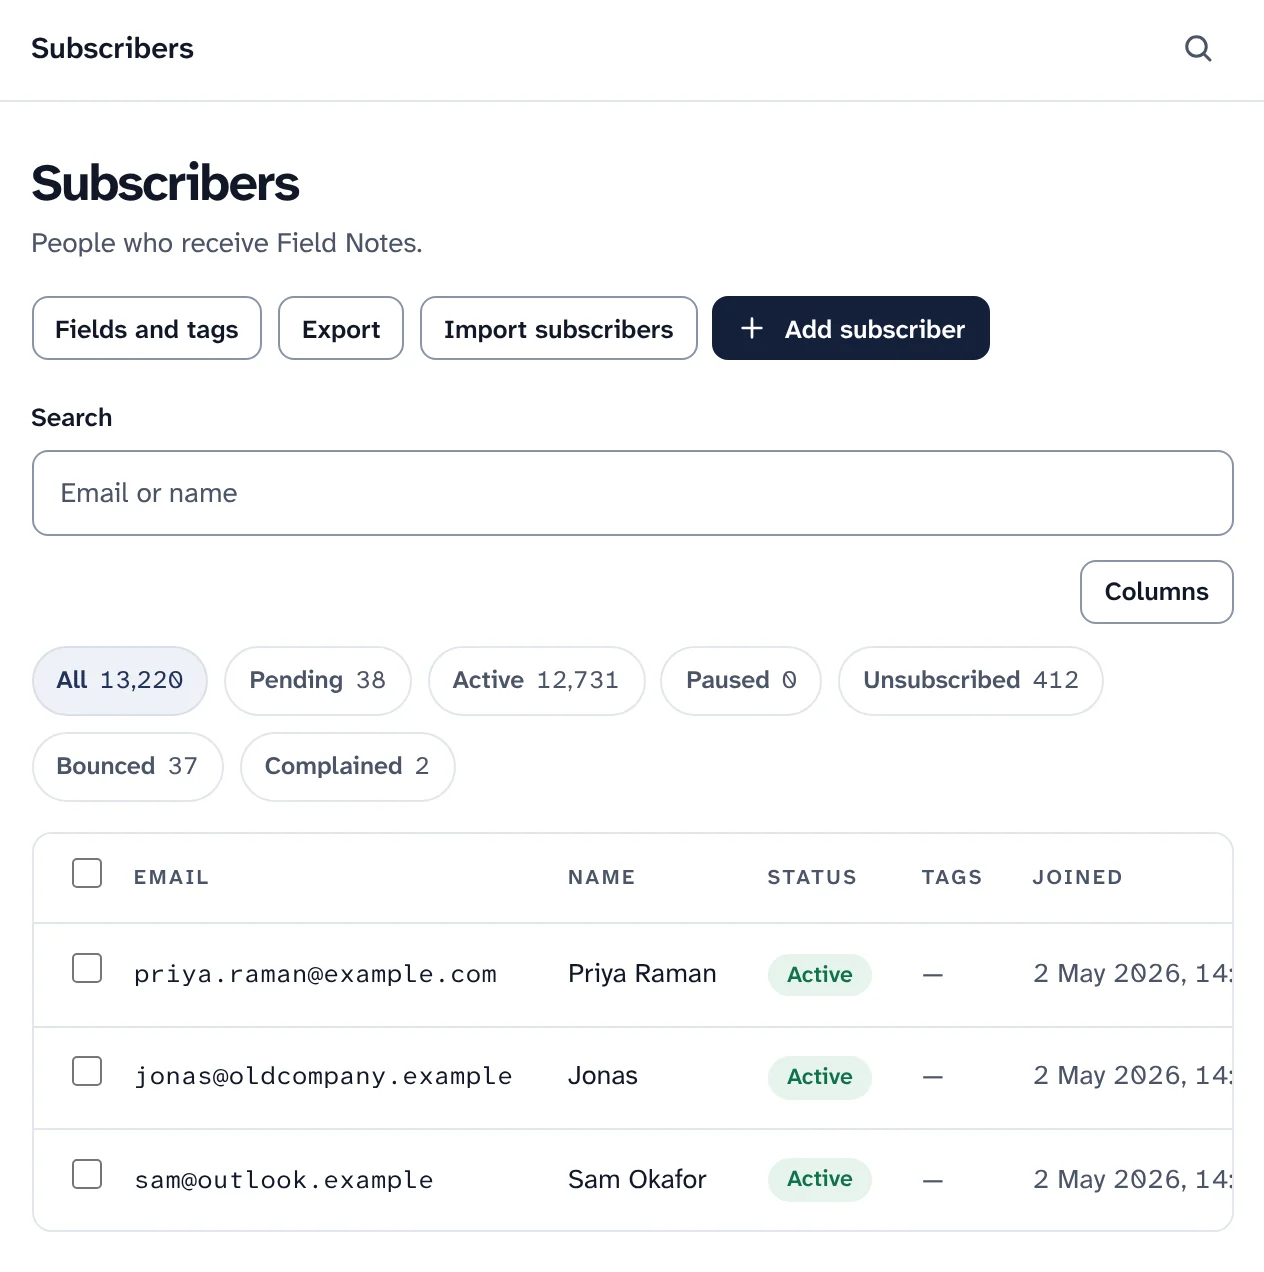
Subscribers, with a count for each status. Sample data. What each subscriber status means Status What it means Gets your posts Pending Added or signed up, but has not confirmed yet No Active Confirmed, or added with their agreement Yes Paused Taking a break until a date, then active again by themselves No Unsubscribed Left the list, and can join again whenever they like No Bounced Their emails bounced and your bounce rules stopped mailing them No Complained They pressed "report spam", so Swarm stops mailing them No -
Step 2
Open one subscriber to see their whole story
Click an address to open that subscriber: their status with Pause until and Unsubscribe, bounces and what the receiving server said, their paid plan, profile, tags and fields, where they came from and who referred them, the automations they went through, and what they were sent, opened and clicked.
Delete subscriber is not a full erasure. When someone asks for their data to be deleted, use Settings, Privacy, New request instead: that clears them from every publication of the workspace and stops the address being added again.
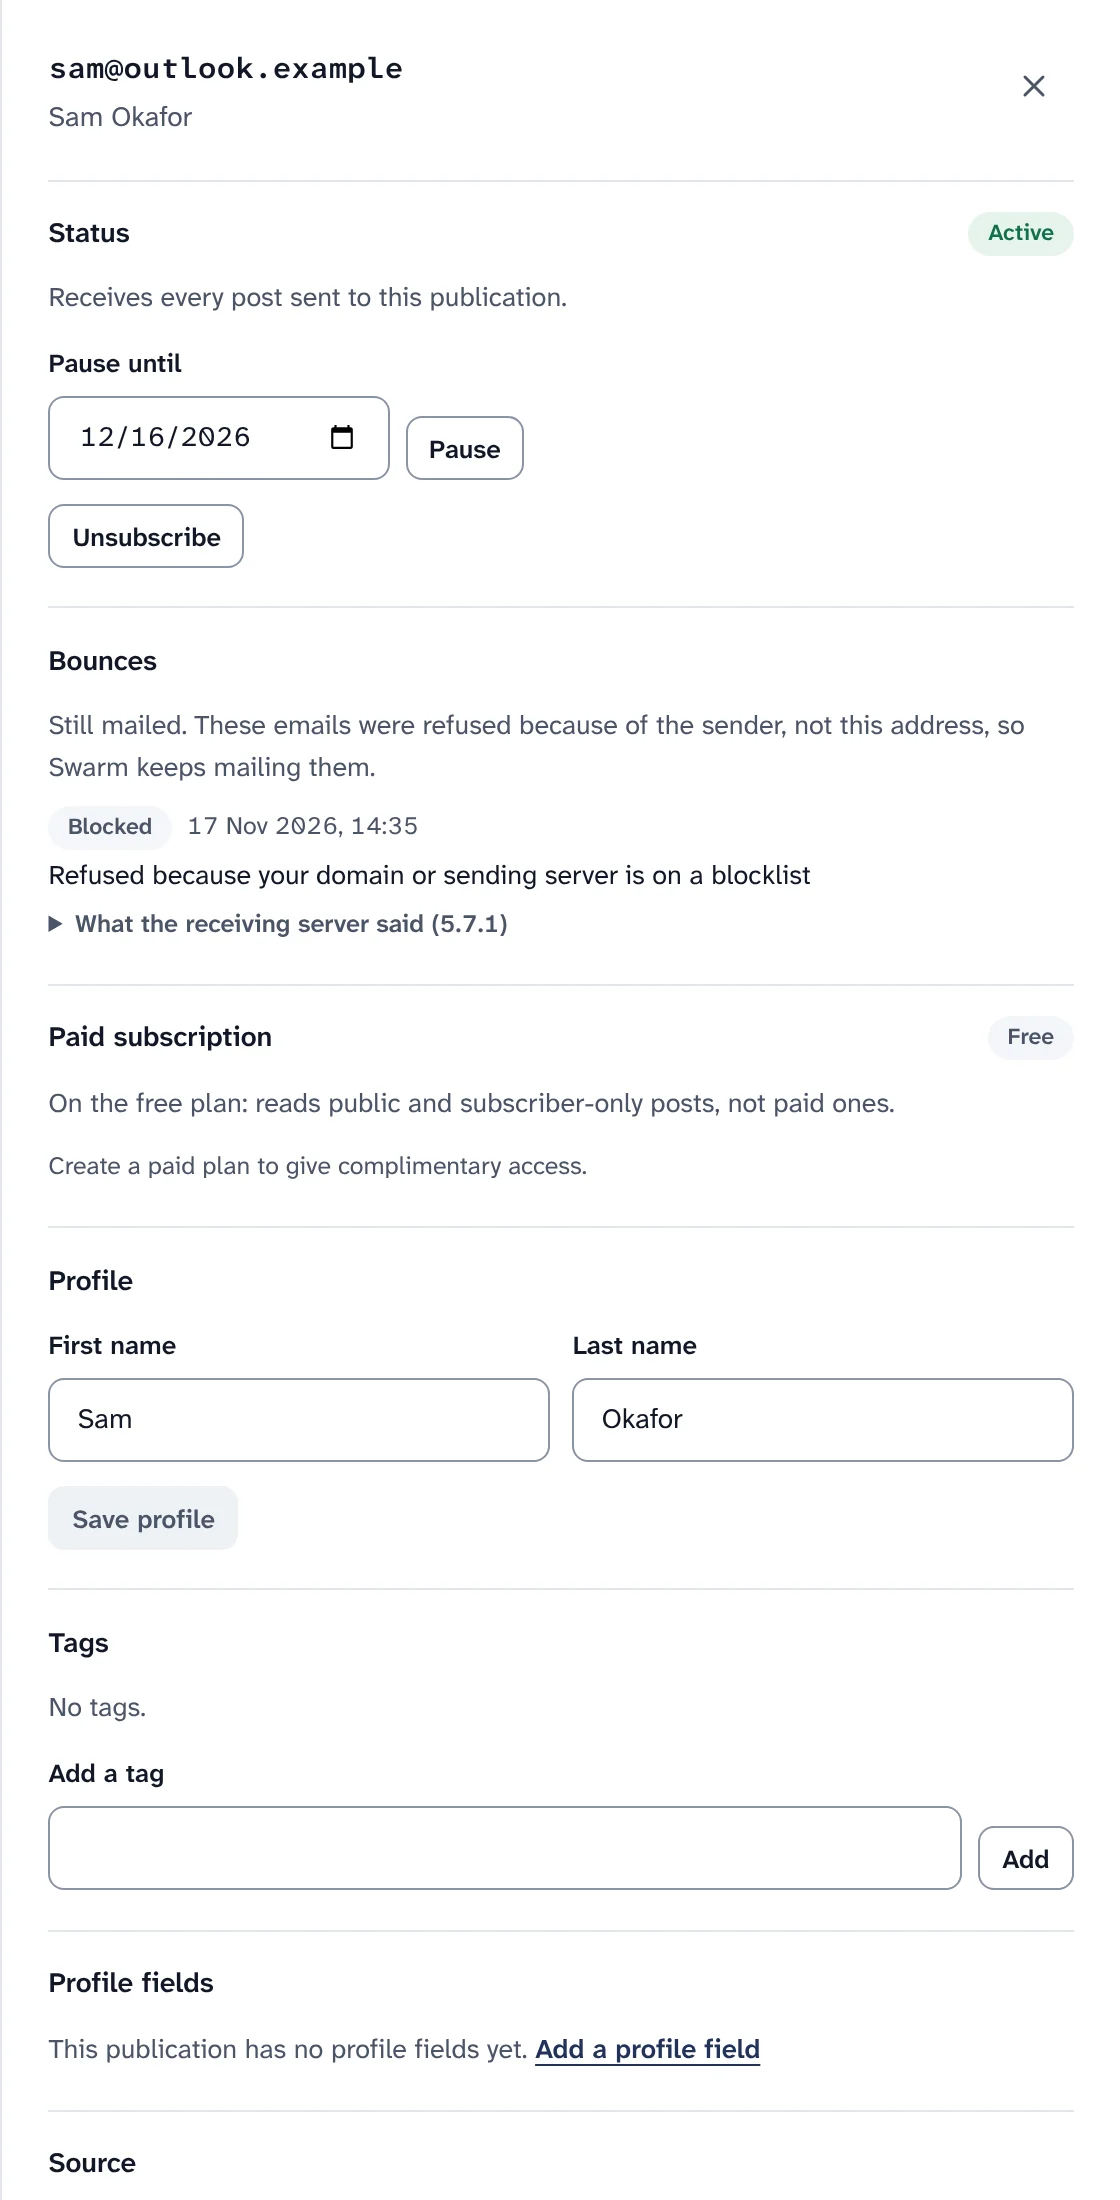
One subscriber, with a block that did not stop their emails: it was about the sender, not the reader. Sample data. -
Step 3
Import a list, with a dry run first
Press Import subscribers, choose a CSV file or a file exported from another newsletter platform, and map each column to email, first or last name, tags, one of your profile fields, or Don't import. Comma, semicolon or tab separated UTF-8 text works, up to 50 MB and 200 columns.
- Two honest choices: tick "Everyone on this list agreed to receive this publication" only if it is true; without it new people are imported as pending, and no email is sent. "Update subscribers who are already on the list" is off unless you tick it.
- Run the dry run. Nothing is written yet. The review shows how many rows fall into each group, with examples, and what the import means for warm-up.
- Every import adds a tag that starts with
import:, so you can find those people later.
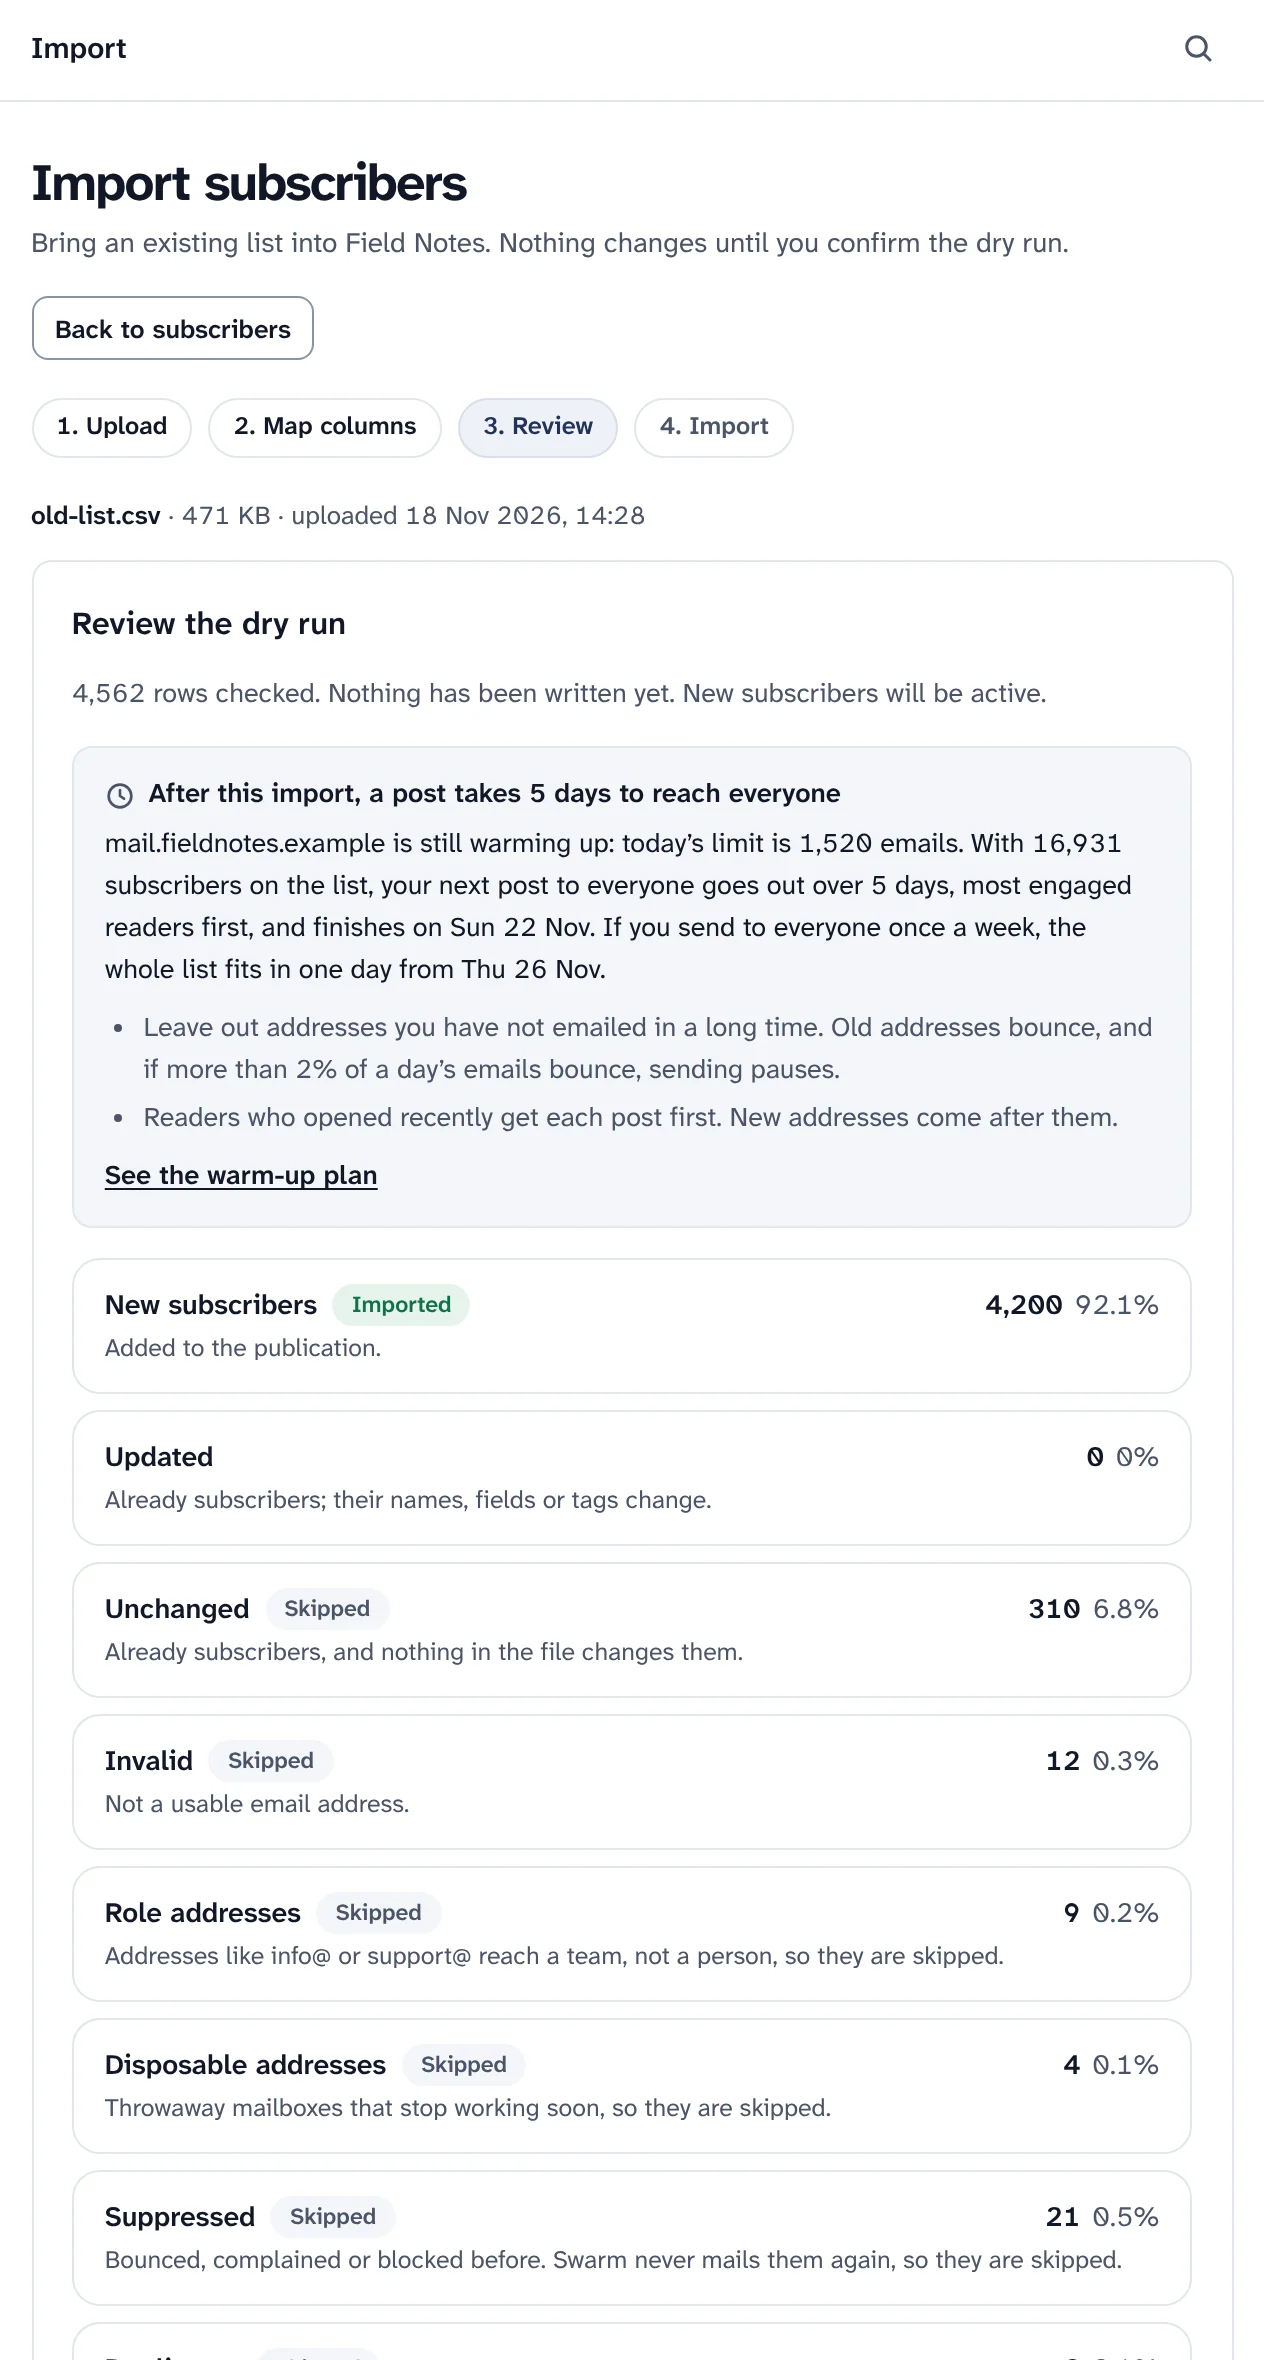
The review of a dry run, with a note on warm-up. Sample data. Why rows of an import are skipped Group Why Invalid Not a usable email address Duplicates An earlier row has the same address; only the first counts, whatever the capital letters Role addresses Addresses like info@orsupport@reach a team, not a personDisposable addresses Throwaway mailboxes that stop working soon Suppressed Bounced, complained or was blocked before; Swarm never mails them again -
Step 4
Keep what you know: fields and tags
Tags are simple labels, such as
Lisbon. Profile fields hold a value for each subscriber: text, a number, a date, yes or no, one choice or several. Use a field in a post as a merge tag like{{fields.company}}, in a segment rule, or on a signup form.- Sensitive fields can be encrypted when stored. Segments can then only test whether the field is set.
- Take your list out at any time: export as CSV or JSON Lines with every profile field. Each download is in the audit log, and the file is deleted after 72 hours.
- Export destinations copy subscriber data to storage of your own on a schedule.
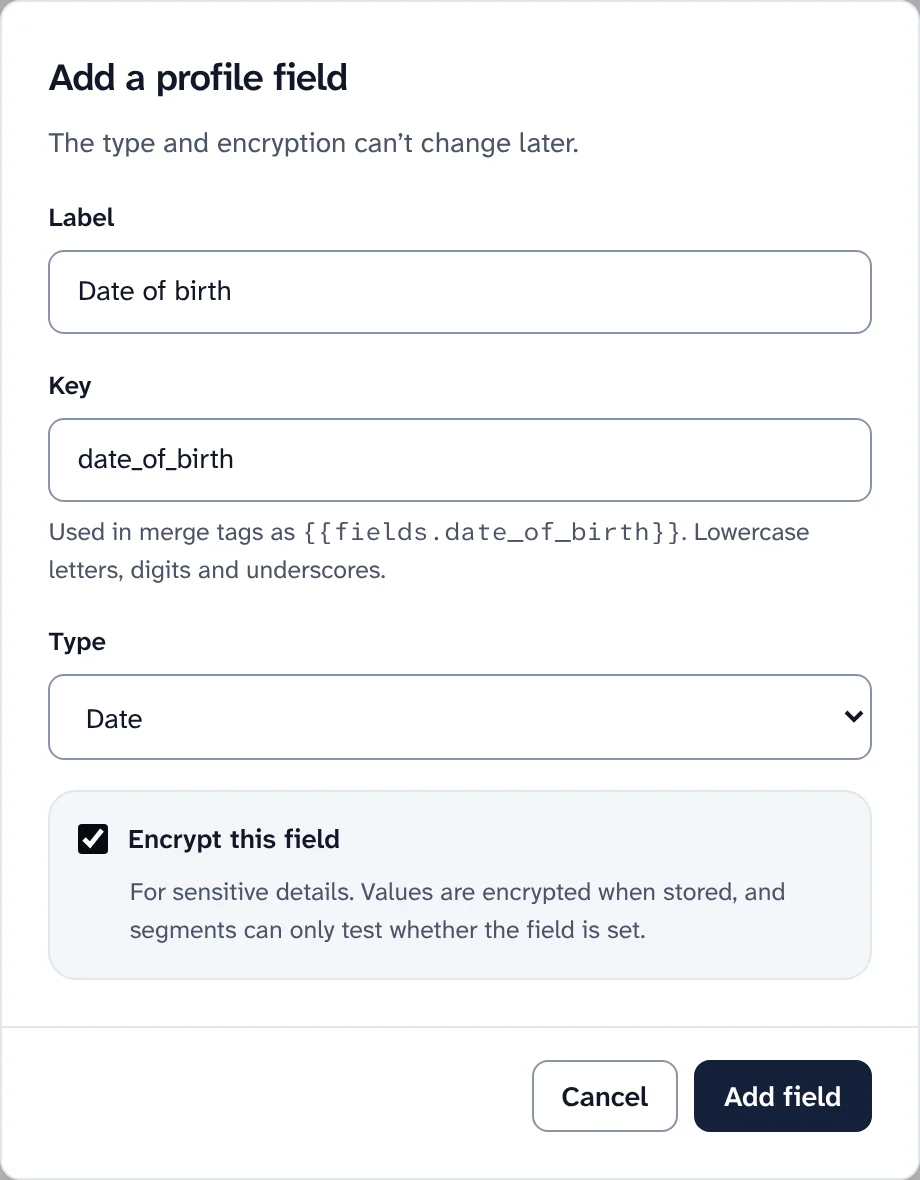
Adding a profile field that is encrypted when stored. -
Step 5
Group people with segments that keep themselves current
A segment is a group defined by rules: subscribers who match all, any or none of the conditions. Look at email and names, status, joined and confirmed dates, tags, opens and clicks, referrals, where they signed up, their paid plan or any profile field, and add groups of conditions inside.
- Who matches now shows the count while you build the rule, saved or not, with up to 25 of the people.
- Send to a segment, or leave one out, under Who gets it in the post editor. Segments are recounted as data changes and on a schedule, so "the last 30 days" stays current.
- Several lists in one publication: Rosters, an optional feature, are lists subscribers choose to be on themselves.
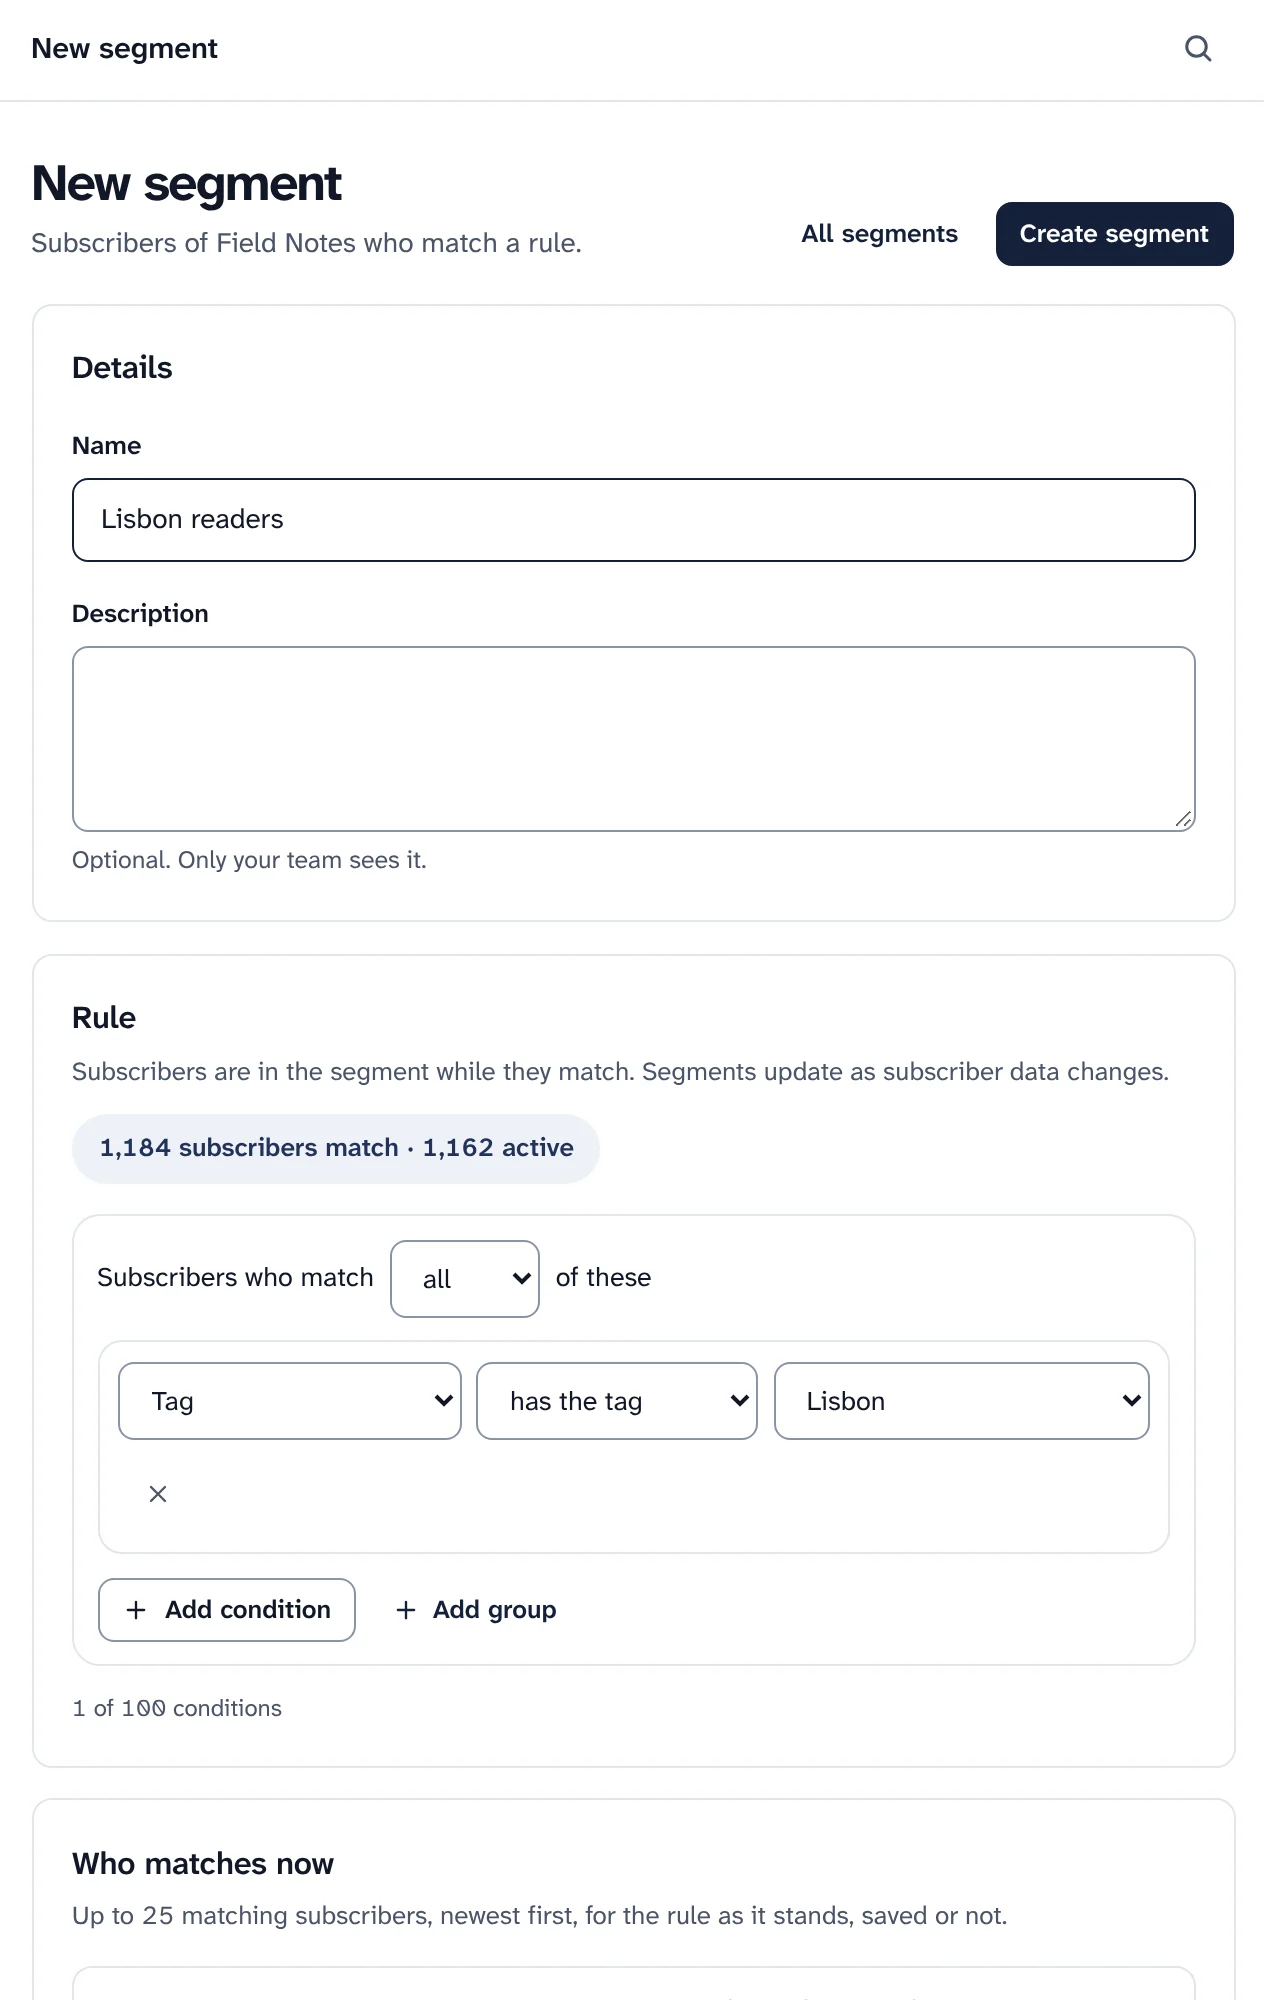
A segment by tag, and how many it matches. Sample data. -
Step 6
Build a signup form, preview it, publish it
Every publication website has a Subscribe button and a signup box from the start. For a site of your own, build a form under Signup forms: choose its fields and a consent checkbox, a regular or slim layout, and where it sits: inline, a slide-in, a popup, or a sticky bar at the top or bottom.
- When and how often it shows: at once, after a delay, after scrolling or when the visitor is about to leave, every visit or less often.
- A preview on desktop and mobile, with a simulator for the trigger you chose. Nothing goes live until you press Publish.
- One line of code to paste, or a plain HTML form for pages that cannot load scripts. The embed code belongs to one version of the form.
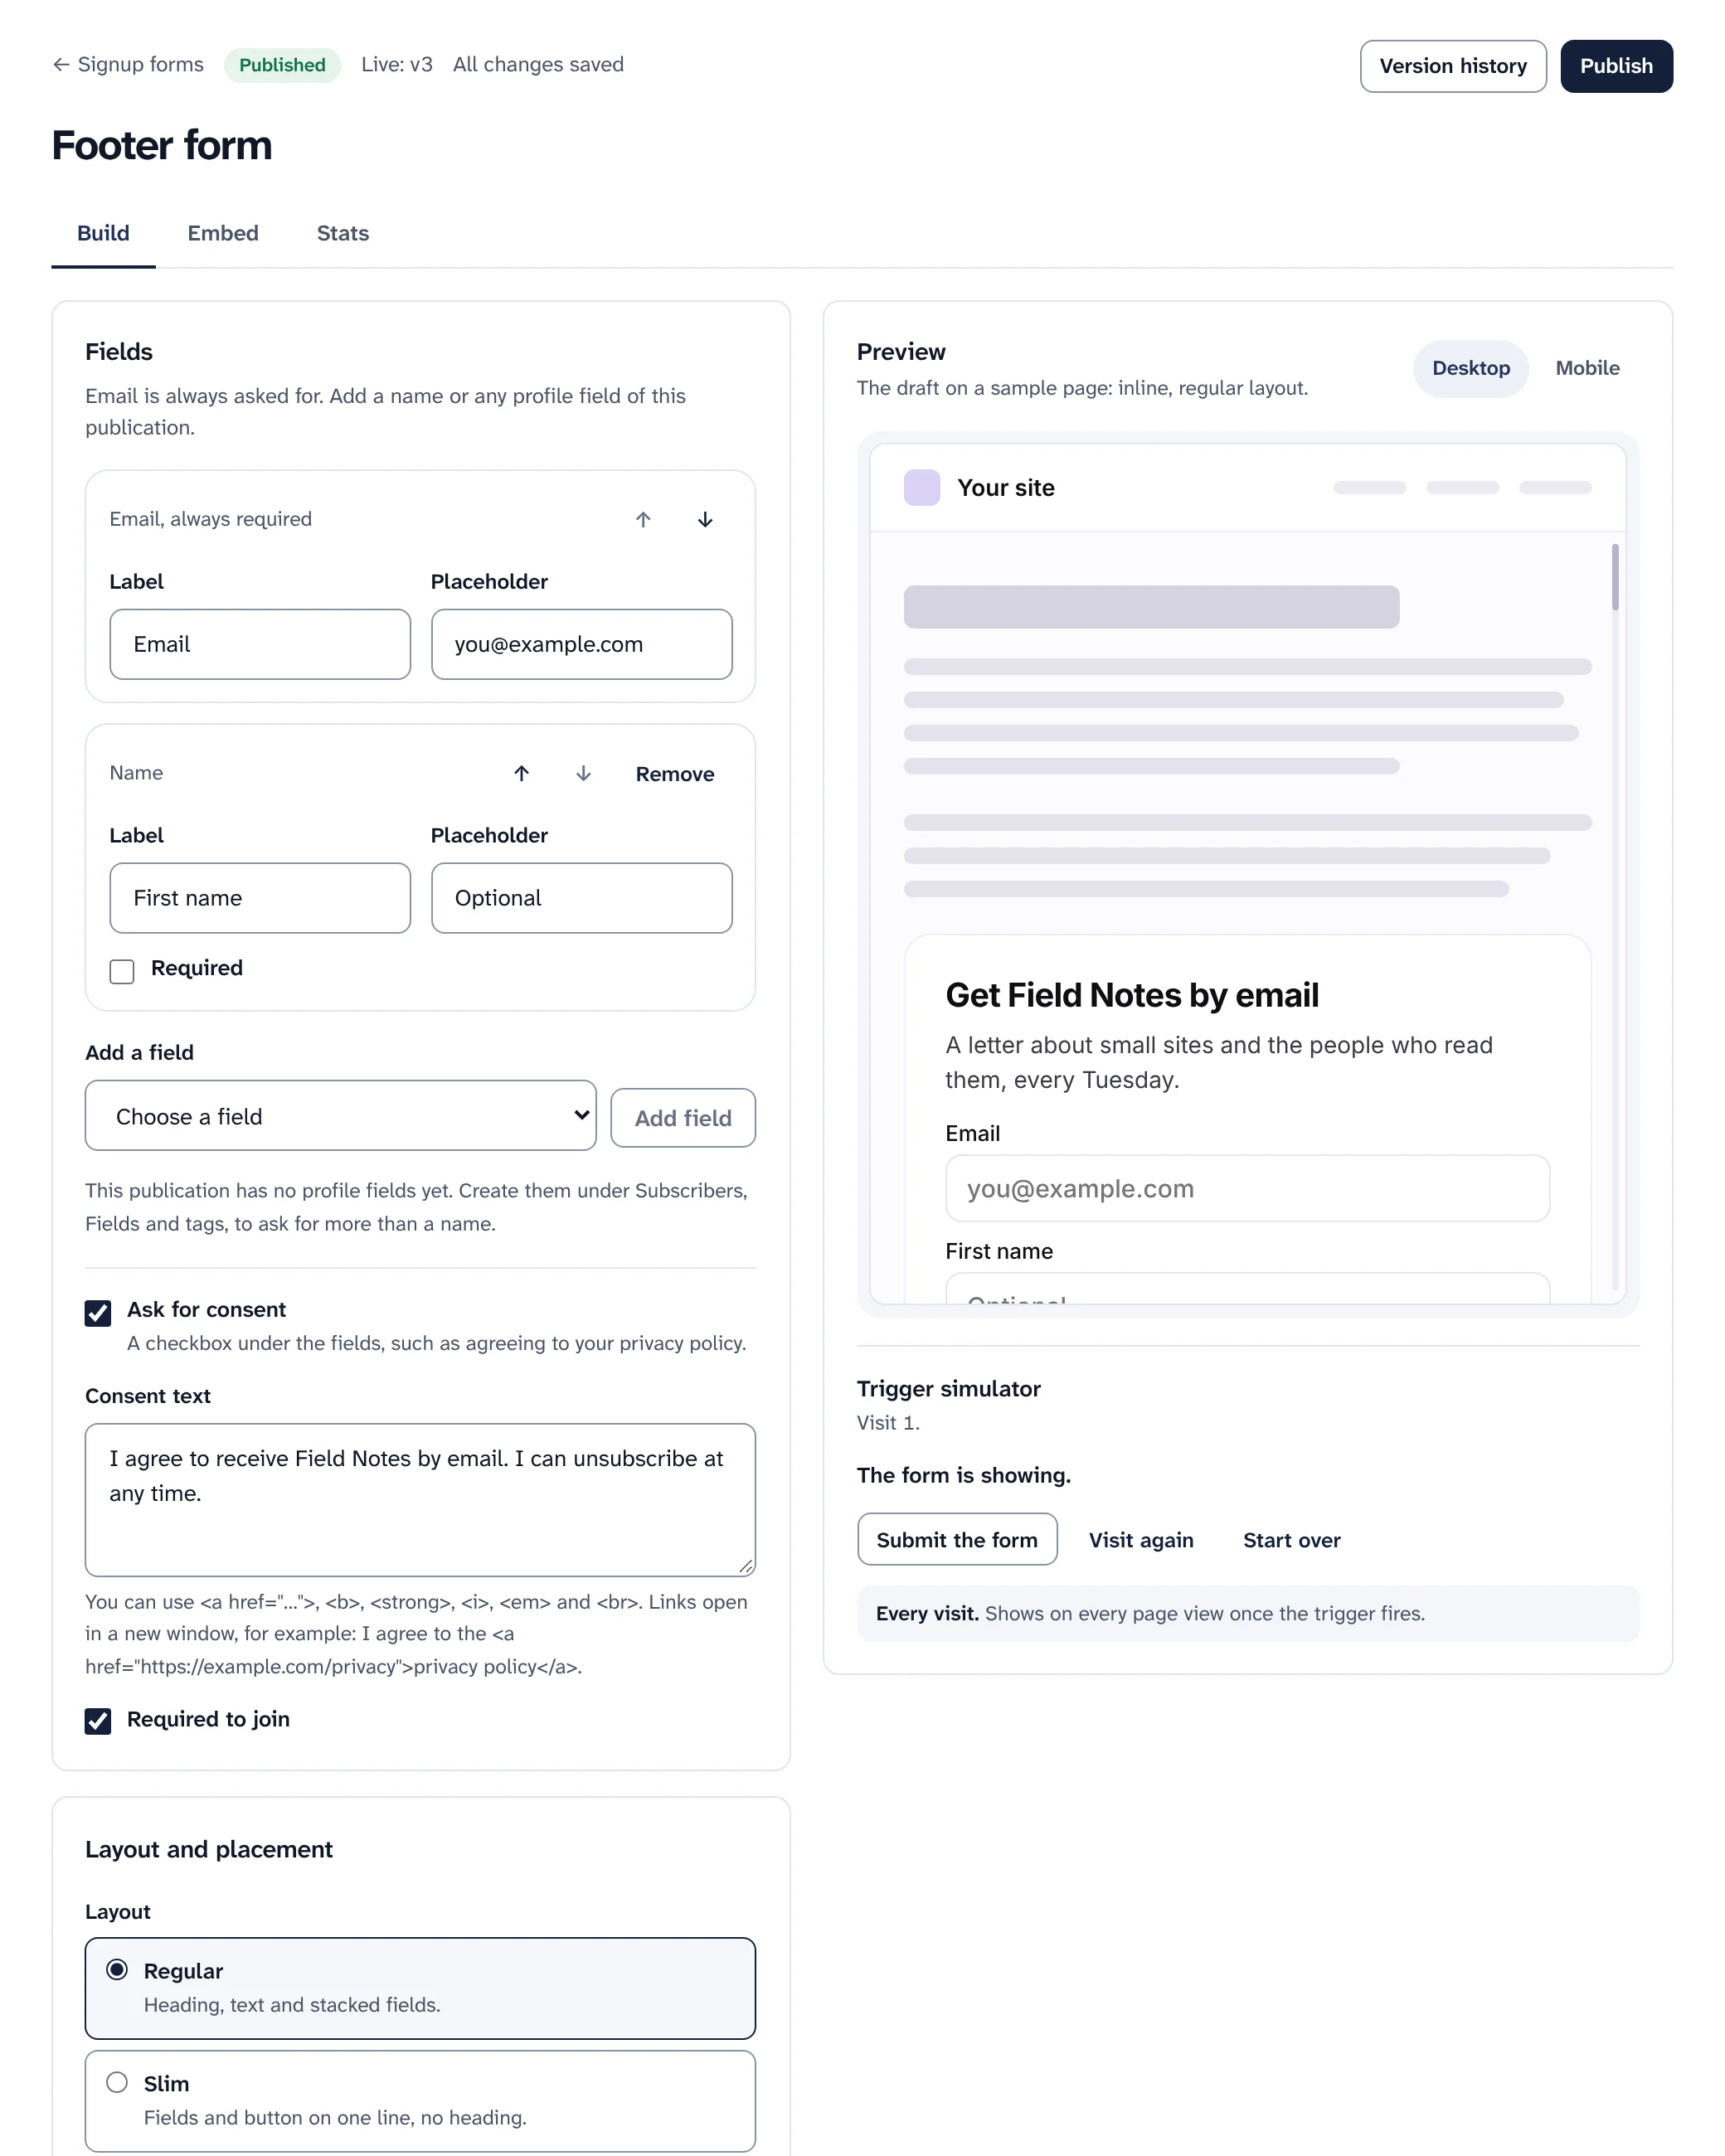
The form builder with its live preview. Sample data. -
Step 7
Confirm opt-in, and a welcome when they do
With double opt-in on, someone who fills in a form gets an email asking them to confirm. The link opens a page, and only its Confirm button confirms, so mail scanners that open every link cannot confirm people by accident. Until then they are pending and get nothing else.
- Set it for the publication, or make every subscriber confirm, including people added by hand or through the API.
- Welcome them: the Welcome email recipe under Automations greets each person the moment they confirm.
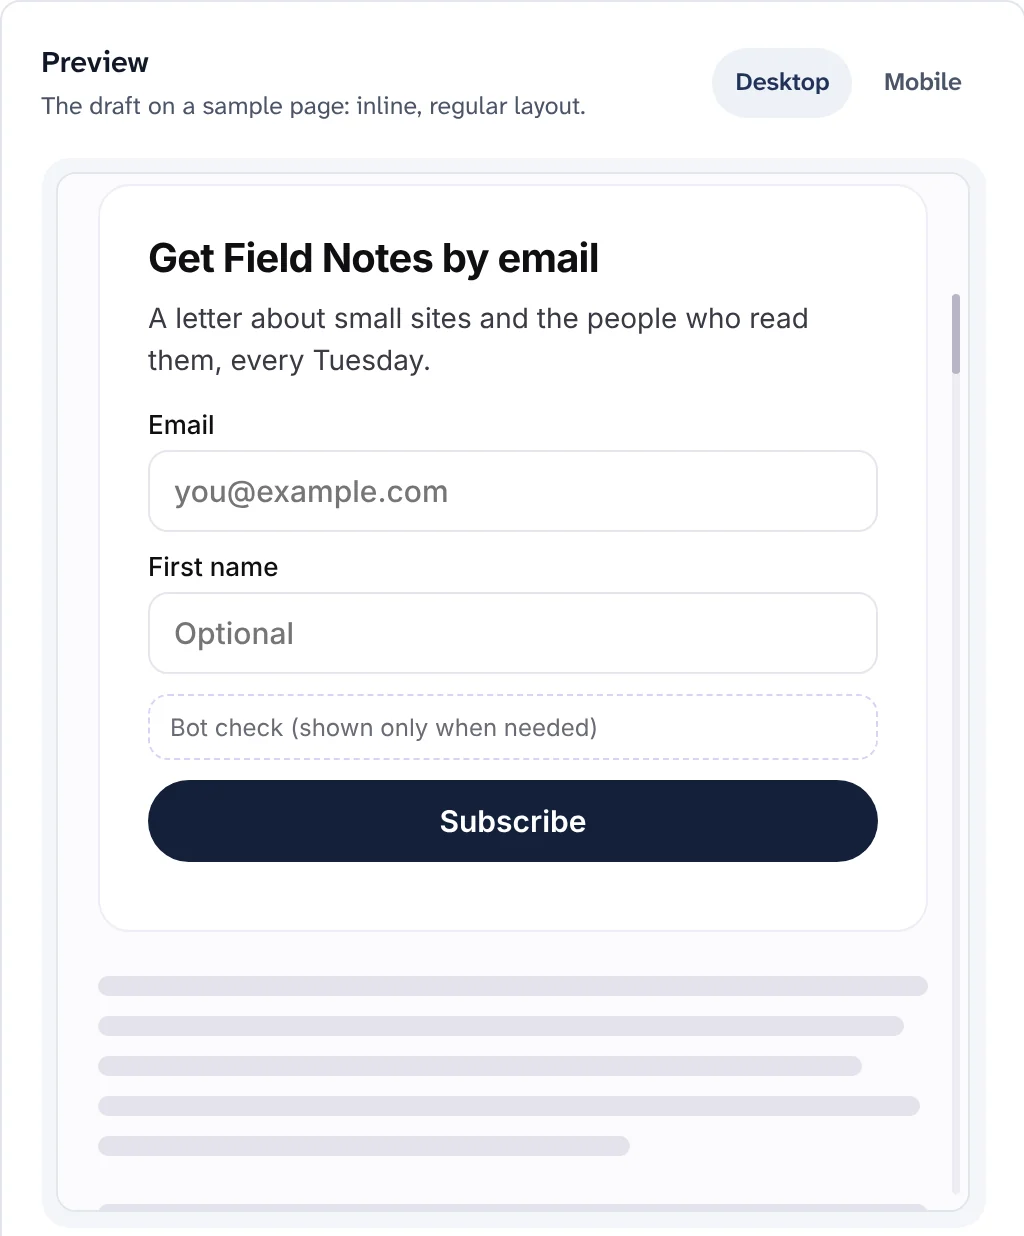
A published form, as a visitor sees it. Sample data. -
Step 8
Let readers manage themselves, and keep blocked addresses blocked
Every email ends with a link to the reader's own settings and one to unsubscribe. On their settings page a reader can change their name, take a break for 2, 4 or 8 weeks, unsubscribe, or ask for a copy of their data or its deletion. Unsubscribing never needs a sign-in, and the one-click button of their mail app works too.
Unsubscribed is not blocked. An unsubscribed reader can join again. Blocked addresses (complaints, bounces your rules stopped, and addresses you block by hand) are never emailed, and imports skip them.
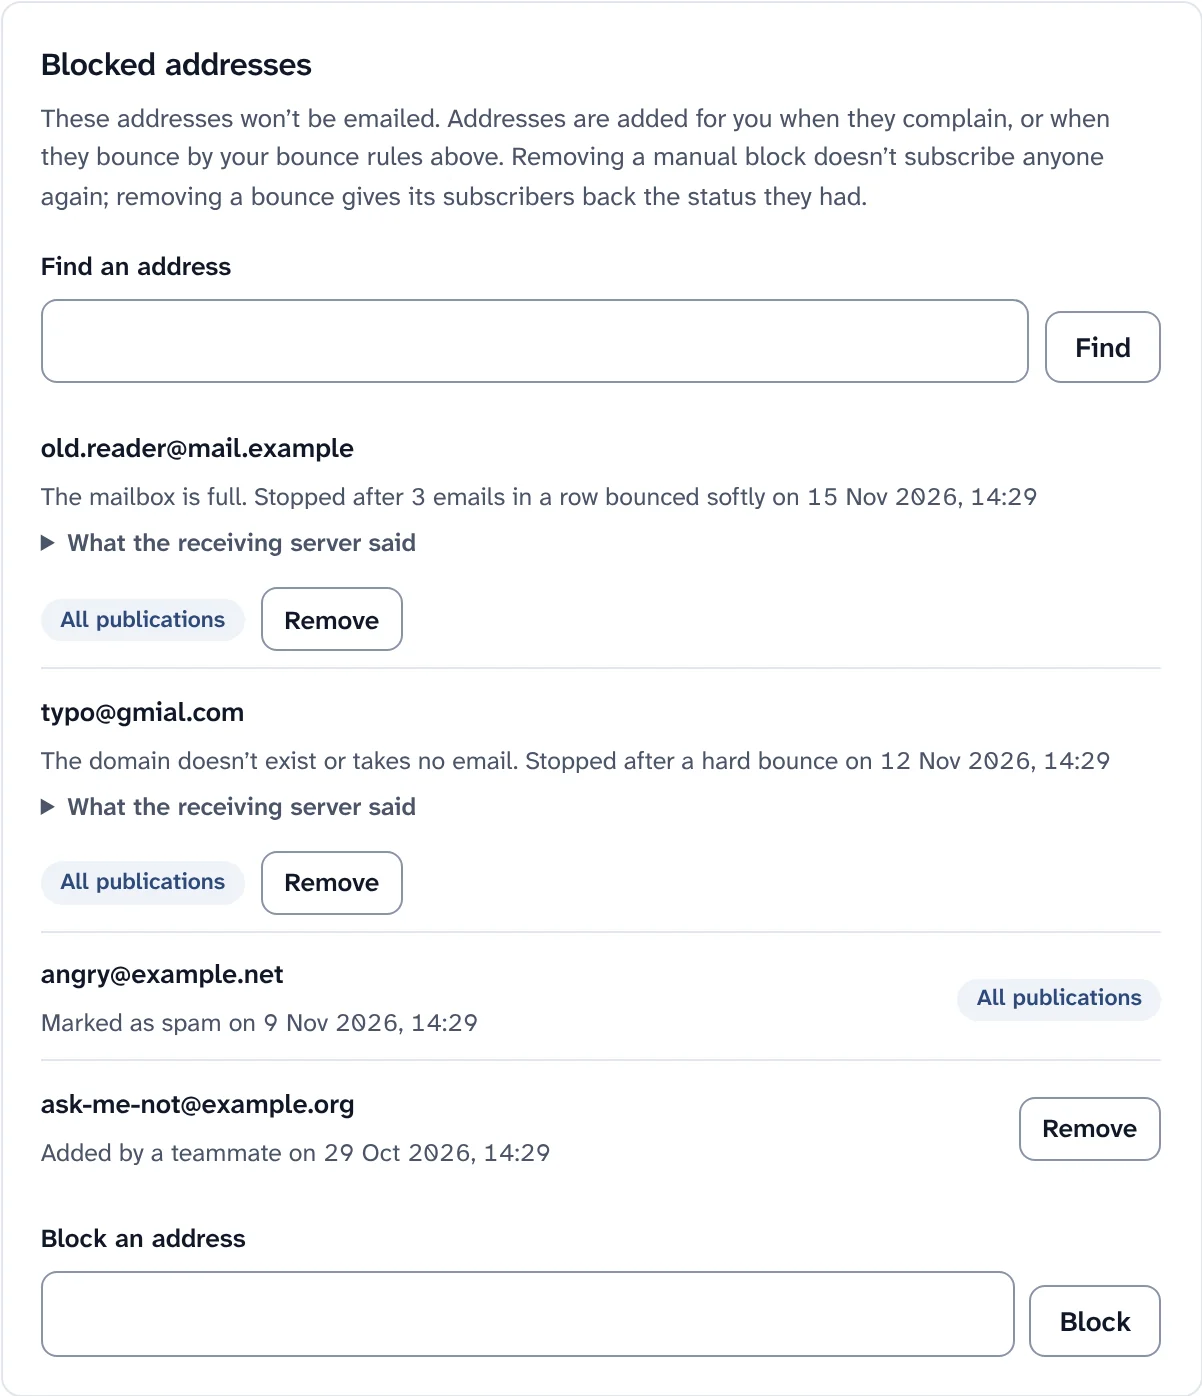
Blocked addresses under Sending and delivery. Sample data.
Good to know before you import
Your list is the most valuable thing you have, and the easiest to damage. These are the rules Swarm follows, and the ones it asks of you.
- Only import people who agreed to hear from this publication. A bought or borrowed list brings spam complaints, and a handful of those is enough to send everything to spam.
- Moving from another platform? Export only your active subscribers, and leave out everyone who unsubscribed, bounced or complained there.
- Inactive readers can be unsubscribed for you after 6 months, a year or 2 years with no opens or clicks. It is off by default, and never runs while open tracking is off.
- Where subscribers came from (link tags, referrer and landing page) starts off, because in some countries it is personal data.
Paid subscribers are a separate move. Moving payments between platforms depends on your payment provider, and Swarm's guides do not cover it.
Keep reading
Bring your list home.
Install Swarm, import your subscribers with a dry run first, and put a signup form on your site.
Want to look first? pnpm swarm --dry-run shows every step and changes nothing.